Switched batch step-by-step overview
You can create a Switched batch file using the Switched batch ordering template and Switched batch formatter tool.
To use the Switched batch template and formatter tool:
- Click Orders, click Manage Orders, then click Batch.
- In the Ordering Type field, select the Switched radio button.

Switched batch formatter template
- In the Templates section, click Switched Batch Ordering Template to download the template, then fill it out based on your request (add/change/disco/block/unblock action for ANI/8xx/calling card).
- See Switched Batch Required Fields.
- You can copy the information directly from another Excel spreadsheet into the template, or manually key the information in the appropriate fields.
- Submit Date and LOA Date should be keyed with the year first, the month, and then the date YYYYMMDD (Example: 20140429)
- See Switched Batch Required Fields.
- Delete the header line (The first line that identifies what should be populated in each column)
- Save the file. (File must be saved as delimited text file—other formats of text will error out.)
Uploading the file into web-based Switched batch formatter tool
- In the Formatting Tools section, click Switched Batch Formatter (Web-Based).
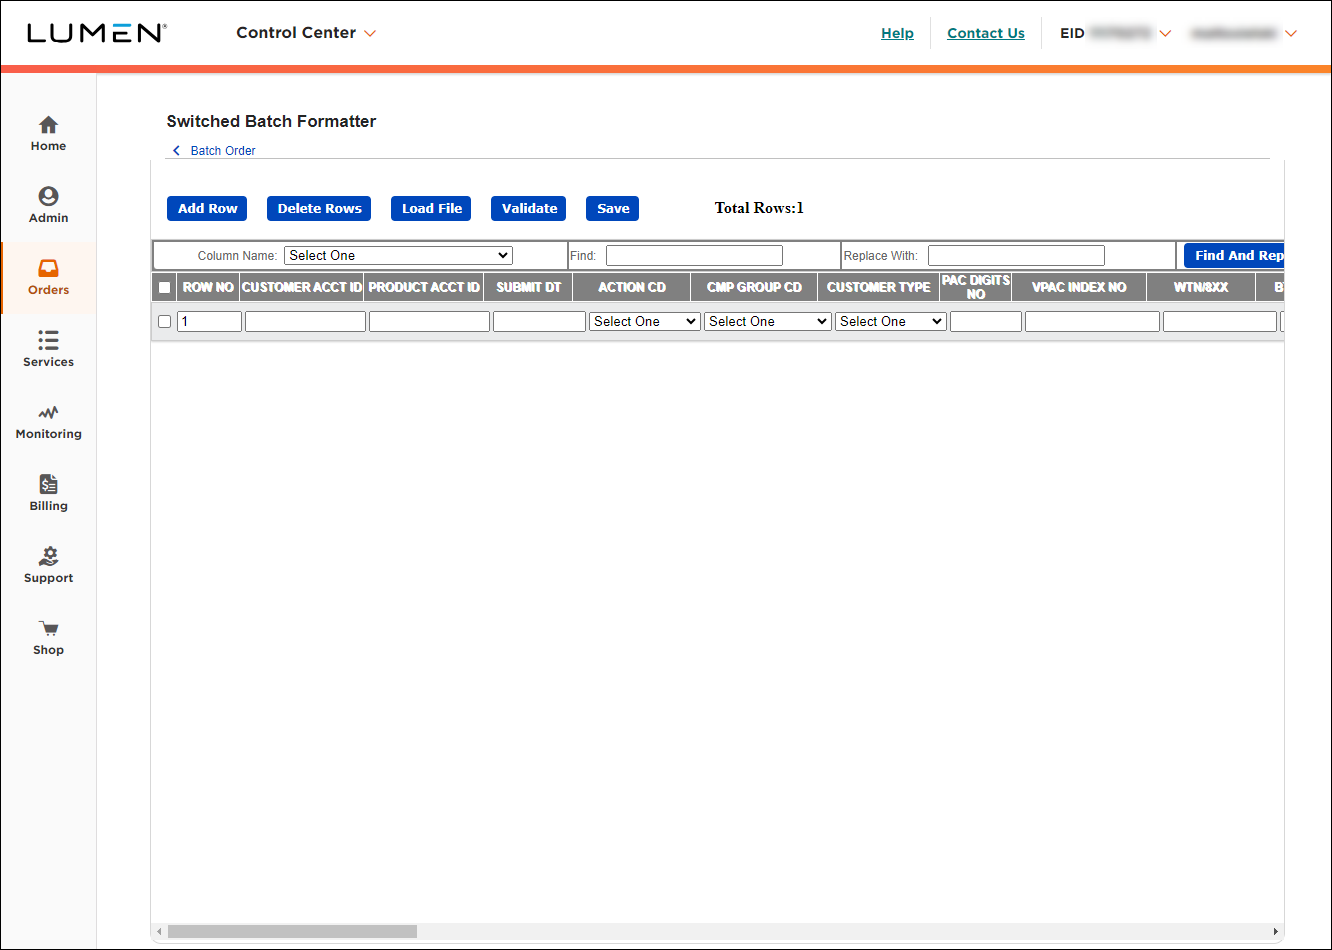
- Click Load File.
- Click Browse, navigate to your file, then click Open.
- Click Load.
The formatter tool loads your data.
- Validate the file:
- Click Validate button.
New window/tab will open with errors.
- Correct any errors.
- Click Validate button.
- Save the file:
- In the Web‑Based Switched Batch Formatter Tool, click Save.
- Save as: Customer Code/Date/Letter.txt (e.g., CTL042924A.txt)
- Click Save.
- In the Web‑Based Switched Batch Formatter Tool, click Save.
- Open your saved file to update customer code:
- Your file maybe saved in a different format so you will need to open it in notepad for it to remain in text format.
- When you open your file it should now have a header line starting with all Hs and a footer line starting with all Ts.
- On your header line you are going to see BATCH_ID=abcd. You need to change the generic abcd to your desired RMC ID.
- Your file maybe saved in a different format so you will need to open it in notepad for it to remain in text format.
- Save your changes to the file.
Loading your file into Control Center
- In the Upload Files box, click Browse, navigate to your file, then click Open.
- Click Send.
Control Center loads your file.
Checking to determine if your file was processed or was a bad file
- Determine if your file was processed or if it was rejected as a bad file. Go to Orders > Order Status > Preliminary Order Status. Search for file name (case sensitive), or search for Ordering Method as Switched Batch.
- Click on the link under the Parent Order ID column, and an overlay will display with two tabs: Order Details and Files.
Files will display:
- Upload: the file will initially sit here waiting to be picked up for processing.
- Archive: the file is moved here when it is successfully picked up for processing.
- Bad Files: the file is moved here when it is rejected, see DIR.LOG in Upload for more information.
- Results: 4 results files are generated, open the .WHL file using Notepad.
- Upload: the file will initially sit here waiting to be picked up for processing.
- Reviewing a successful processed order:
- Your order will list all the services submitted, and identify if the service was accepted or rejected.
- If the individual service rejected the report will give you an explanation of why it rejected.
- At the bottom of the file it will also identify Total Records Processed, Total Records Accepted, Total Records Rejected.
- Your order will list all the services submitted, and identify if the service was accepted or rejected.
- Reviewing your bad files:
- See DIR.LOG in Upload for more information.
- Some common issues resulting in rejected file:
- The Batch ID on the header line was not changed from generic to the customer code.
- There was an extra line at the bottom of the file.
- The Batch ID on the header line was not changed from generic to the customer code.
- See DIR.LOG in Upload for more information.
Not quite right?
Try one of these popular searches:
Explore Control Center
Top content
- Signing in to Control Center
- Retrieving your username or password
- Creating a new user
- Adding accounts to an enterprise ID
- Creating a repair ticket
- Creating a disconnect request
- Deactivating or reactivating a Control Center user
- Editing a notification setting
- Paying an invoice online
- Viewing an invoice


